One-time passwords in Debian Wheezy with libpam-otpw

While public and private keys with decent pass-phrases are an excellent way of logging in securely to a remote system, it’s sometimes simply not feasible. Your Android device which normally does the job for you is out of battery, you are in a remote country with only a wired connection in a shady Internet café, or – <diety> forbid – your laptop was stolen while logged in and you desperately need to get on that system right now.

Anyway, one-time passwords, implemented as “opie” in earlier Debian versions, are now available as “otpw”. These allow you to generate securely stored single-use passwords that are safe to use “in the field”, and even have counter-measures to attacks like a keylogger opening several SSH connections to your host, trying to guess the last character of the one-time password before you type it.

The following guide will disable the use of ordinary passwords, keeping public/private key login enabled, followed by otpw if no key is provided. Thus, you can log in with your key if you have one, without being asked for a one-time password, but if you don’t provide one you get the password prompt.

To install this beauty, we need the pam module and the client program:

apt-get install libpam-otpw otpw-bin

Next, we need to configure /etc/pam.d/sshd to use the newly installed module. For my setup, I want to disable normal passwords, so I comment out the common-auth line, then add otpw.

# Standard Un*x authentication.
#@include common-auth

#OTPW
auth required pam_otpw.so
session optional pam_otpw.so

/etc/ssh/sshd_config needs some changes too. These are the relevant lines:

ChallengeResponseAuthentication yes
PasswordAuthentication no
PubkeyAuthentication yes
UsePrivilegeSeparation yes

The only really important line is the ChallengeResponseAuthentication one, which is what we’ll be using for otpw. Public keys and privilege separation are normally enabled by default, and as I mentioned I wanted to disable PasswordAuthentication, which covers the use of normal account passwords.

Because we changed the config, we need to restart sshd:

# /etc/init.d/ssh restart

Time to generate some one-time passwords:

$ otpw-gen --help
One-Time Password Generator v 1.2 -- Markus Kuhn
otpw-gen [options] | lpr
Options:
    -h <int>    number of output lines (default 60)
    -w <int>    max width of output lines (default 79)
    -s <int>    number of output pages (default 1)
    -e <int>    minimum entropy of each one-time password [bits]
            (low security: <30, default: 48, high security: >60)
    -p0        passwords from modified base64 encoding (default)
    -p1        passwords from English 4-letter words
    -f <filename>    destination file for hashes (default: ~/.otpw)
    -d        output debugging information

$ otpw-gen -h 20 -e 48 -p1
Generating random seed ...

If your paper password list is stolen, the thief should not gain
access to your account with this information alone. Therefore, you
need to memorize and enter below a prefix password. You will have to
enter that each time directly before entering the one-time password
(on the same line).

When you log in, a 3-digit password number will be displayed.  It
identifies the one-time password on your list that you have to append
to the prefix password. If another login to your account is in progress
at the same time, several password numbers may be shown and all
corresponding passwords have to be appended after the prefix
password. Best generate a new password list when you have used up half
of the old one.

Enter new prefix password: 
Reenter prefix password: 

Creating '~/.otpw'.
Generating new one-time passwords ...

OTPW list generated 2013-01-24 23:17 on slave

000 csce stub neat rope down  016 keep ness mine mock bile
001 pubs ever judo pert kemp  017 blip stan nana file shaw
002 ecsc bone hare hiss make  018 serb ills swam torn rump
003 page type owen dark lent  019 avid bran avid amps lair
004 unto hype fits bets loco  020 putt rout disc gogh bile
005 kits hard sums lime sore  021 hand rash rigs eels vain
006 foci path call spat tins  022 ship what loos chin pine
007 vote sold book gait name  023 yolk mont pubs main kilt
008 band cone draw mats fact  024 para must mala curd tire
009 oboe mill hair chad mont  025 pope slid olds ores dive
010 maps head frog eden teal  026 bony leas bcci jerk need
011 chas memo ives duck revd  027 womb pahl bird ruby naff
012 graf gosh rays roar pour  028 obey bear iona area gain
013 slab sons damn dell pass  029 sort jazz sega rigs onus
014 erik rags tact roar rags  030 lost lump cubs seat film
015 bees aces thee pump kant  031 aura road funk laid hibs

     !!! REMEMBER: Enter the PREFIX PASSWORD first !!!

Now you should be good to go. The next time you connect, you’ll be asked for one, or three, one-time passwords. Three passwords are requested when multiple logins happen simultaneously and other potentially suspicious situations. See /usr/share/doc/otpw-bin/otpw.html for details.

REMEMBER: The password you typed as your “prefix password” has to be entered before the password otpw asks for. If my prefix password was “hello”, and the application asked for password 031, I’d enter “helloauraroadfunklaidhibs”. Spaces can be typed if you want, but they are ignored.

This is what a typical login looks like for me.

$ ssh home.sweet.home -l bolt
Password 026: <This would be hellobonyleasbccijerkneed if my prefix password was still "hello">
Linux home.sweet.home 3.2.0-4-686-pae ..........

That’s about it. Remember there is no reason your prefix password needs to match your actual password on that system. They have no relation. It is a good idea to choose a different prefix password, especially if you happen to have “sudo” installed and set up for your user, so you’re not typing a password that can potentially make you root to log in from a shady web café. Someone just might take over your machine.

Bugs

There is, at the time of writing, a bug in Debian Wheezy preventing the session optional pam_otpw.so line from displaying a count of your remaining one-time passwords upon a successful login. Until that is resolved, you might want to add the small snippet Wolfgang Kroener posted on the bug to your login scripts.

Snippet:

if [ "$SSH_TTY" -a -f $HOME/.otpw ]; then
  PW_LINES=$(wc -l <$HOME/.otpw)
  PW_USED=$(grep -- ---- $HOME/.otpw | wc -l)
  echo "OTPW $PW_USED/`echo $PW_LINES-2 | bc` used"
fi
Disable UAC in Windows 8

While Windows 7 let you disable UAC by simply typing “UAC” into the search field on the start menu and disabling it from the UAC options that show up, Windows 8 made it a bit more complicated.

In short, press Windows+R, type secpol.msc, go to “Local Policies => Security Options” and set “User Account Control: Run all administrators in Admin approval mode” to “Disabled”. Reboot.

Windows 8 non-pro does not have “secpol.msc”, so we have to resort to the registry. Go to Start->Run->”regedit”, go to “HKEY_LOCAL_MACHINE\SOFTWARE\Microsoft\Windows\CurrentVersion\Policies\System” and set the value of the “EnableLUA” key to 0.
Again, reboot.

Please note: While disabling UAC in this way gives you and all applications you run complete admin rights to the machine, the equivalent of running everything as “root” on a Linux machine, it also breaks almost every single Metro app in horrible ways. Only do this if you really need to.

CD-ROM Raspberry Pi case

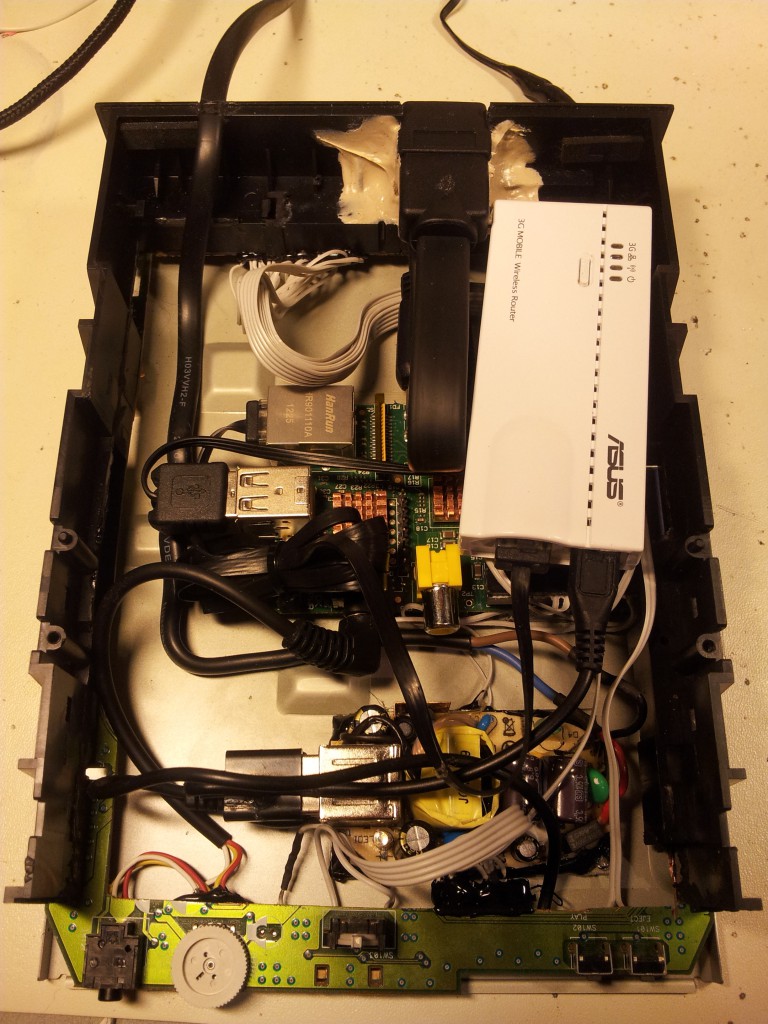
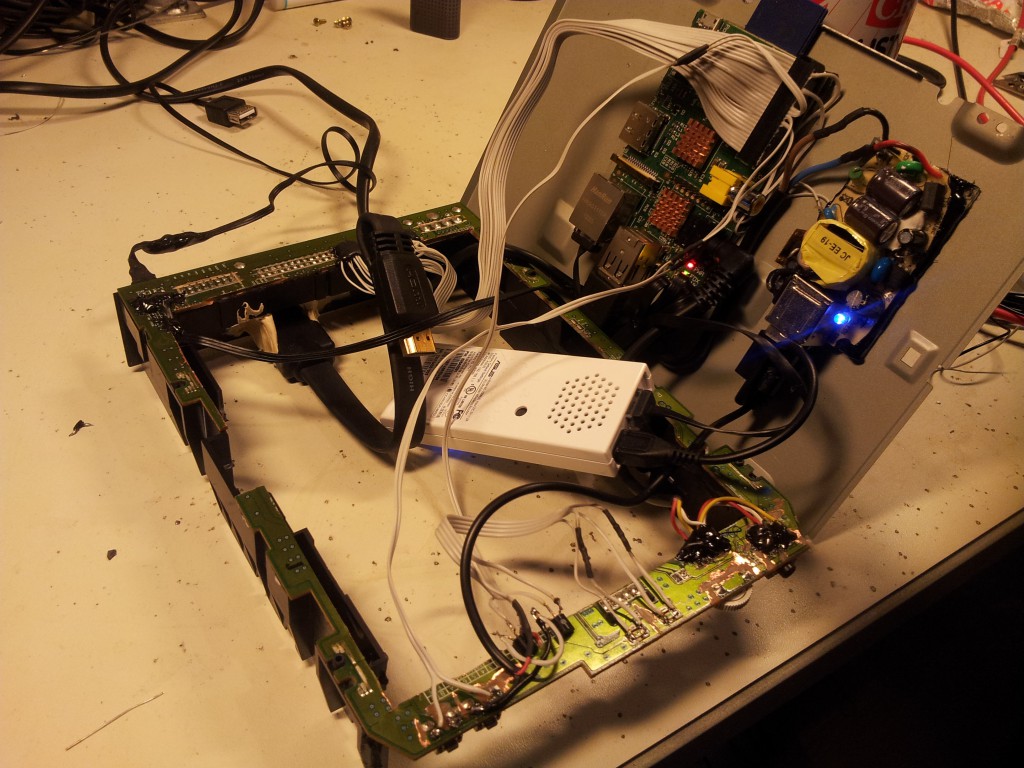
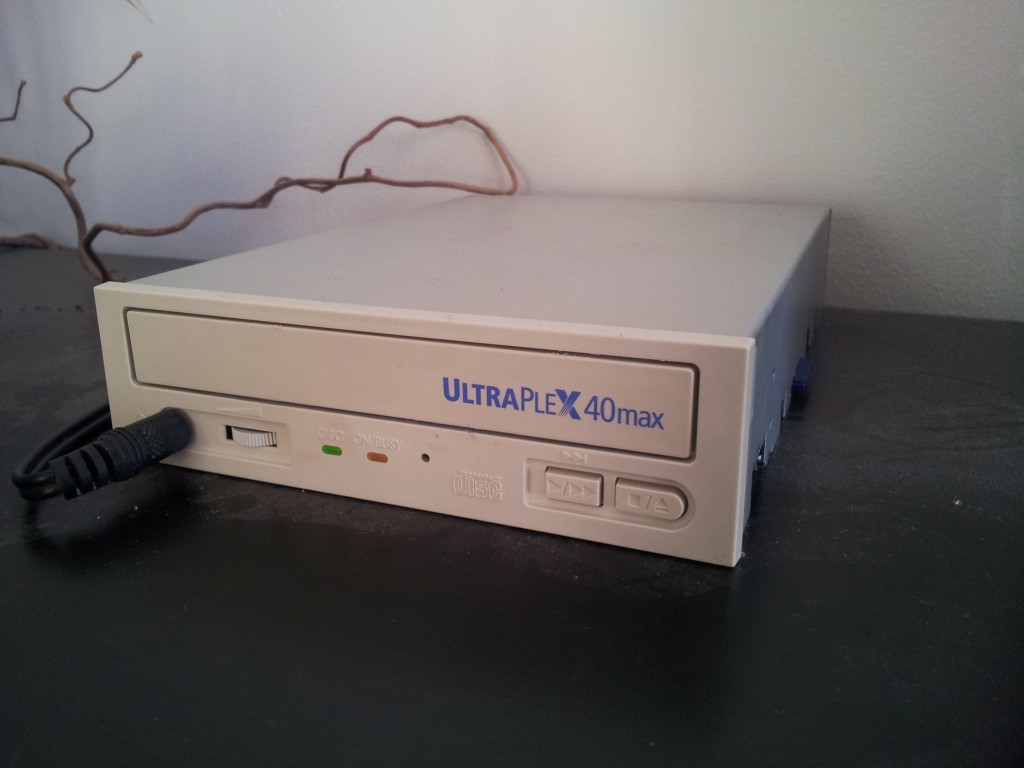
I built a case for my first Raspberry Pi out of an old CD-ROM. Here’s a post about it.

Components

  • Plextor UltraPlex 40 Max SCSI CD-ROM (faulty)
  • Asus WL-330N3G wireless client
  • Vanson Twin-USB Power Adaptor (2A, 5V, model SMP-600A005USB)
  • A power cable, a short HDMI extension cable, an audio cable, an IDE cable and some other wires
  • Some memory heatsinks for the Pi
  • Some plexi glass
  • Two 2N3904 NPN transistors, two 0.25W 300 ohm resistors
  • A Raspberry Pi model B, rev. 1
  • Probably some more stuff that I forgot about

What, why, how?

I decided the Raspberry Pi hanging around in the livingroom, mostly running pianobar while connected to the stereo, needed a case. It was already divided into several components connected by random, curled up cables and it wasn’t pretty. The Raspberry Pi may look small and convenient, but that’s just until you realize you need a power supply, wireless capabilities and whatever else you expect to find in a computer.

Anyway, I had an old Plextor CD-ROM in the parts bin and decided to try and use it as the new home for my Pi.

Current state

  • The Pi works and runs quite cool
  • Power is connected to the Pi through the 5V and GND GPIO pins, as a USB cable on the power connector side would poke out of the case. Also, they’re soldered to the bottom of the PSU, saving one USB port for other use.
  • The Pi and the power supply are both mounted on plexiglass, for insulation, which in turn is attached to the case
  • Wireless is offloaded through the Asus wireless device, making the Pi think it’s connected to my network via cable
  • Sound output on the front of the case works, volume control works
  • The play and stop/eject buttons on the front are connected to GPIO, and clicks are registered, though I haven’t figured out what I want them to do
  • The DISC and ON/BUSY leds on the front work and are controlled by software
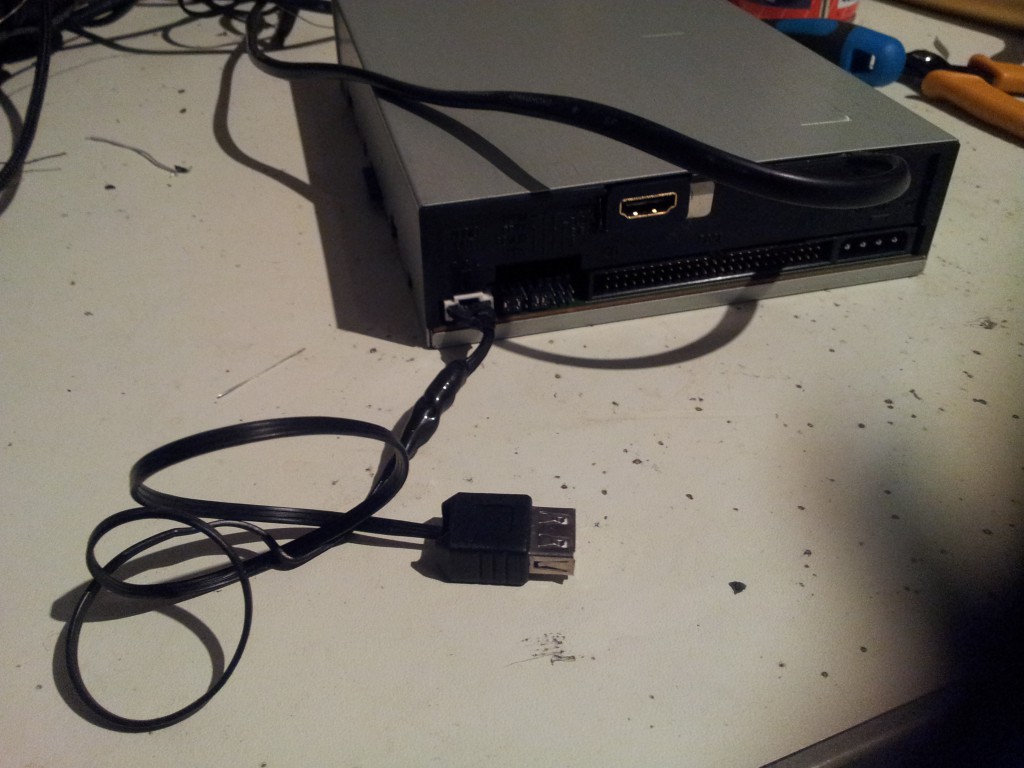
  • USB is available on the back with a modified cable which fits the analog audio connector at the back
  • All GPIO pins are available on the SCSI connector at the back
  • HDMI on the back
  • Memory card peeks out about two millimeters through a slot on the right side of the case (can be seen at the left in the last image)
  • Runs Raspbian 🙂

GPIO

As stated above, the GPIO ports are all available on the SCSI connector on the back of the CD-ROM. I plan to do something interesting with them later. However, I am already using some of them internally. Firstly, I power the Pi using the 5V and GND pins instead of the micro USB port. I also use two pins for the front lights, and two pins for the front buttons. I wrote a small python script to control these for now. Currently, the “disc” light lights up unless a button is pressed (for testing the buttons), and the “on/busy” light lights up randomly based on the load. If the load is >=1.0, it will stay on constantly, otherwise it blinks simulating random CD-ROM reads.

To wire these up, I gutted a USB cable to provide ground to the buttons and power for two 2N3904 transistors. Since the Python GPIO library for the Pi now has pull-up functionality, the pin from the Pi can go directly on the other connector of the button. No additional components needed. For the lights, I used the 2N3904 transistors to provide sufficient current without stressing the Broadcom chip onthe Pi. I connected their base to the GPIO pins. Power is provided from the gutted USB cable and passed through a 300 ohm resistor on the way to the LED’s.

Pictures

20121228_125913

20121227_232838

20121227_232221

20121227_230515

20121227_232855


Using CheckInstall to track custom source downloads on Debian

CheckInstall keeps track of all files installed by a “make install” or equivalent, creates a Slackware, RPM, or Debian package with those files, and adds it to the installed packages database, allowing for easy package removal or distribution.

Use CheckInstall instead of just running “sudo make install“, as that will likely put files all over the filesystem, with no easy way of removing them if things go wrong. If in the future you try to install a package that contains the same file as the software you are compiling, you will receive errors and the software you compiled may stop working.

(In fact, checkinstall can keep track of files modified by any command line, not just a “make install“, so you can use it for any type of installation task outside of apt, and it will keep track of the installation in the package manager.)

Installation

aptitude install checkinstall

Usage

Instead of:

make install

Run:

checkinstall

When called with no arguments, checkinstall will call “make install“. If you need other arguments, they can be supplied:

checkinstall make install_package

The installed package can then also easily be removed:

dpkg -r <package>

Use CheckInstall with auto-apt

You can use auto-apt when you want to build a simple package from source with checkinstall. You need to have auto-apt installed!
Instead of:

./configure

Run:

auto-apt run ./configure

If the dependencies are available, a dialog box opens and ask you to install them
The rest remains the same:

make checkinstall

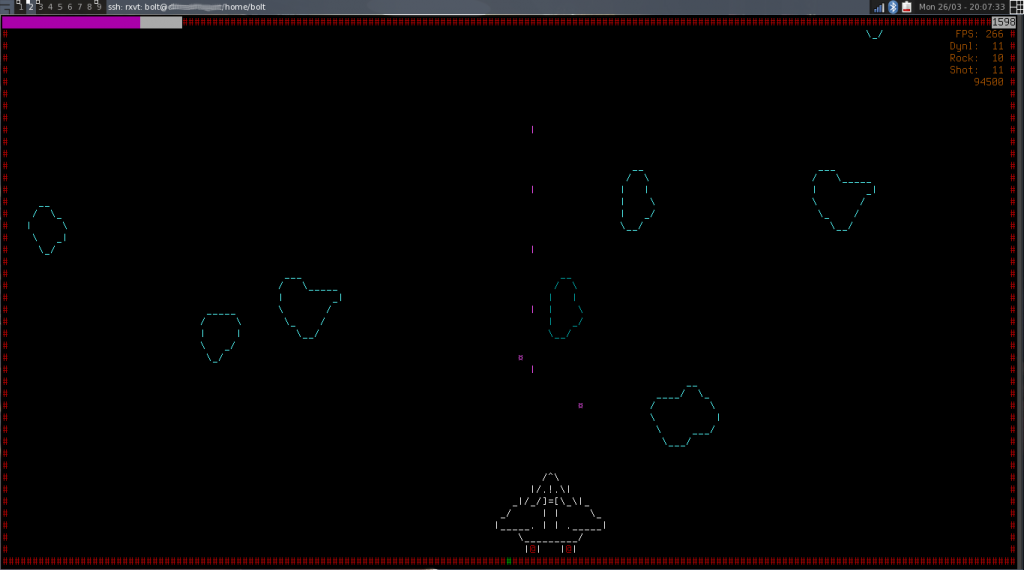
ShellShock – a Bash 3 / Bash 4 spaceshooter!

My weekend project: A top-down space shooter in Bash
Note: Bash is SLOW. This requires an Intel Core Solo or better to run well.
Comments welcome. Patches twice as welcome.

Link: http://www.dhampir.no/stuff/bash/shellshock.bash

Update:

Since the name “ShellShock” was used as a nickname for a Bash exploit, this game has received a whole lot of attention. I even got a patch!

Security wizard and generally awesome person Mikko Hypponen of F-Secure recently tweeted about it, and it even made the front page of digi.no. Here are some pictures.

shellshock-mikko shellshock-digi

Pausing and continuing a process on Linux

If you want to pause a process while you do something else, like for instance stop a heavy file operation while you’re just moving some stuff around quickly, there are two signals to pay attention to: STOP and CONT.

STOP will pause a process (not actually stop it – it doesn’t die)
CONT continues a stopped process, and does nothing if the process isn’t stopped.

An easy way to experiment with this is to start xeyes:

$ xeyes &
[1] 26114

In this case, xeyes got the Process ID (PID) 26114. You can use “ps” to find Process ID’s of running processes.

Xeyes is an application that shows two “eyes” on the screen, with eyeballs following your mouse pointer around.

To pause this process I use, in my case “kill -STOP 26114”. Notice the eyes stop moving to follow the mouse pointer. “kill -CONT 26114” resumes the application.

Linux on Mac Mini – power on after power loss

The Mac Mini doesn’t save this information in its BIOS (or equivalent), so you need to set it on each boot. I use my distribution’s /etc/rc.local file for this.

Either way, these are the commands to run (copy, and uncomment the correct line for your Mini):

## PPC Mac Mini
#echo server_mode=1 > /proc/pmu/options

## Intel Mac Mini
#setpci -s 0:1f.0 0xa4.b=0

## nVidia Mac Mini
#setpci -s 00:03.0 0x7b.b=0x19

## Unibody Mac Mini
#setpci -s 0:3.0 -0x7b=20